Sunday, October 29, 2023

Jesus: Name Above All Names Card

This month over at Die Cut Divas, the challenge is sponsored by Birch Press Designs, and the theme is to use layering dies. I only have one die set from Birch Press, and it's this gorgeous Enchantment layering die set. There are 3 cover plates that combine to produce amazing depth in this design. I really love the effect!

I was originally thinking of using this die set to create a background for a card challenge where the colors were red, orange, and pink, but in the end, I couldn't bear to cover all that beautiful die cutting with the rest of the challenge requirements. Instead, I opted to use a Papertrey Ink stamp and die set to fill the bottom area where the dies cut out 2 optional arches that can be added to the rest of the die cut cover plate area or used separately. I love that versatility! I opted to include them on the inside of the card and leave that area on the front empty so I could include the die cut "Jesus" and the stamped sentiment "Name above all names." As I have been studying the gospel of John this year in my Bible Study Fellowship class, I have been struck anew by the absolute supremacy of Jesus. He alone is the Savior of the world. And He has the power and authority to forgive sins and give eternal life to everyone who puts their faith in Him. 


Inside the card:


Challenges I'm entering: 
 

The Diva's that cut ....paper! (die-cut-divas.blogspot.com): Use dies layered on each other (4/4; ends at the end of the month)

Polkadoodles Cardmaking, Craft & Scrapbooking Challenge: ATG (3/4; ends 11/10/23)

Gem of A Craft Challenge (pinkgemchallengeblog.blogspot.com): ATG (3/3; ends 11/10/23)

Lil Patch of Crafty Friends Challenge ...: ATG (ends 11/4/23)

TIME OUT Challenges: Anytime I focus on Jesus, I think of His great love for me shown by His willingness to die in my place to pay for my sins. This is what I am most grateful for in all the world! And it's so true that when we focus on our gratitude, our perspective shifts dramatically. C5


Fly Framed Card

For this card, I dug into a box of butterfly-themed goodies I have in my stash and chose this House Mouse Designs clear stamp, pattern paper with clouds, and a chipboard frame with butterflies. I stamped and colored the image with colored pencils and then adhered first the image and then the pattern paper to the chipboard frame. Then I adhered the frame to some pale purple card stock and final adhered all that to the pink A2 card base. I thought it needed a little something more, so I found some adhesive chipboard letters to add the word "Fly" to the front. I wanted to spell out "Soar," but I didn't have any Rs left in the letter set😂. 


Challenges I'm entering: 
 

 House-Mouse & Friends Monday Challenge (housemouse-challenge.blogspot.com): ATG with option to add a House Mouse friend other than a house mouse (ends 10/29/23) Top 3 Pick 10/30/23

Crafty Catz (craftycatzweeklychallenge.blogspot.com): Any 4-legged critter or ATG (1/3; ends 11/2/23)

Stamping Sensations: Autumn colors or ATG option (3/3; ends 11/1/23)

We Love Stamping: Inspiration board or ATG (There's a bird and a dog on the inspiration board, so having a mouse and butterfly on my card seems to fit with the idea of living creatures on the board, but if that's too loose an interpretation, please consider this ATG) (3/3; ends at the end of the month)

Happy Birthday Card for House Mouse Challenge

This sweet birthday card was created using a woodblock stamp from House Mouse Designs. I stamped the image and colored it with colored pencils. Then I die cut it with a Spellbinders die and adhered it to a 5X7 card base in pink cardstock. I stamped "It's your day" and "Happy Birthday" from a retired Close to My Heart stamp set. 


Challenges I'm entering:

 House-Mouse & Friends Monday Challenge (housemouse-challenge.blogspot.com): ATG with option to add a House Mouse friend other than a house mouse (ends 10/29/23)

Crafty Catz (craftycatzweeklychallenge.blogspot.com): Any 4-legged critter or ATG (2/3; ends 11/2/23)

Stamping Sensations: Autumn colors or ATG option (2/3; ends 11/1/23)

We Love Stamping: Inspiration board or ATG (There's a bird and a dog on the inspiration board, so adding bunnies to my card seems to fit with the idea of living creatures on the board, but if that's too loose an interpretation, please consider this ATG) (2/3; ends at the end of the month)

Saturday, October 28, 2023

Hebrews 11:1 Card

I needed a card for a friend going through a rough time right now, so I got out my SU! Brushed Bouquet stamp set and three shades of pink ink and began making a panel just by stamping three different flowers from the set at random places on a panel of light pink card stock. I cut it to fit a 5X7 side-fold card base I made using a darker shade of pink. Then I added a ribbon with lacey loops on both sides of it to the left side of the top panel before adhering that down to the card base. Then I used a Verve stamp of Hebrews 11:1: "Faith is the substance of things hoped for, the evidence of things not seen." I die cut the verse using a Gina Marie stitched hexagon die and then die cut a larger hexagon from the same set using another shade of pink and used that behind the verse. I added 2 die cut butterflies I created using SU!'s Butterfly Brilliance set and adhered them to the front of the card. 

For the inside of the card, I stamped the largest of the Brushed Bouquet flowers in the bottom left of the sentiment panel and then stamped a sentiment from another retired SU! set called Potted Geraniums that reads: "Reaching out with friendship and caring." That is such a great sentiment for a variety of cards. If you are interested in purchasing any retired SU! bundles at very low prices, my friend Debbie Mageed is selling many of hers and offers free shipping. Here's the current list: Bundles For Sale - Google Docs.


Card front: 


Close up of the verse:


Inside of the card:


Close up of the sentiment: 


Challenges I'm entering:

Butterfly Challenge (butterflyspotchallenge.blogspot.com): I chose the second option of not making a joy-fold card but using lace (I hope my ribbon with lacy loops on the sides counts) and a monochromatic color scheme in pink with butterflies of course (1/3; ends 11/7/23) Hope you are feeling much improved, Mrs. A! Non-shape card winner 11/8/23; email sent

Double Trouble Paper Crafting (doubletroublechallenge.blogspot.com): Thing 1: Florals without pattern paper; Thing 3: insect; Thing 2: Entered Crafter's Café challenge

Crafter's Cafe: #302 - Flowers (crafterscafeblogchallenge.blogspot.com): Flowers (ends 11/11/23)

The Diva's that cut ....paper! (die-cut-divas.blogspot.com): Use dies layered on each other (I used stitched hexagons layered on each other) (3/4; ends at the end of the month)

Allsorts challenge blog: Embossing or ATG (2/3; ends 11/3/23)

Beautiful Blossoms Challenge: ATG with flowers are the focus (3/6; ends 11/12/23)

Creations in Pink: ATG in mainly pink (2/3; ends 11/13/23)

Polkadoodles Cardmaking, Craft & Scrapbooking Challenge: ATG (1/2; ends 11/10/23)

Gem of A Craft Challenge (pinkgemchallengeblog.blogspot.com): ATG (2/3; ends 11/10/23)

simonsaysstampblog.com/wednesdaychallenge/: ATG (5/5; ends 11/1/23)

Stamping Sensations: Autumn colors or ATG option (1/3; ends 11/1/23)

We Love Stamping: The inspiration board features several floral images, including the lovely florals on the teapot in the center. My card has flowers stamped to create the background. (1/3; ends 11/1/23)


Sending Hugs Monochromatic Card

This time over at the Butterfly Challenge, one of the themes is to create a monochromatic joy fold card with butterflies and lace. I chose pink and gathered some different shades pink card stocks. I used plain card stock so I could follow along at Double Trouble where we are to have a floral theme but no pattern papers. My pale pink card base seemed a little plain, so I stamped spots on it from a retired SU! set and then added my lacey die cuts to the sides. The center panel with the roses is a 2-piece Sizzix die that layers together, and I wanted to use it to join in the fun over at Die Cut Divas where the theme is layering dies this month.

The butterflies were stamped using SU!'s retired Butterfly Brilliance bundle, and I die cut a coordinating die from that set out of pink vellum to attach to the butterfly on the front panel. 

I added more stamped and die cut butterflies to the inside of the card and stamped and fussy cut the "Sending hugs" sentiment from another SU! retired set. If you are interested in purchasing any retired SU! bundles, my friend Debbie Mageed has a list of them for sale at great prices with free shipping here: Bundles For Sale - Google Docs.


Challenges I'm entering:

Anything Goes with a Fun Fold for Creative Creases #69 (secretstamper.com): ATG with a fun fold (ends 11/10/23)

 Butterfly Challenge (butterflyspotchallenge.blogspot.com): I chose the first option: Joy fold card, lace, and monochromatic (1/3; ends 11/7/23) Hope you are feeling much improved, Mrs. A!

Double Trouble Paper Crafting (doubletroublechallenge.blogspot.com): Thing 1: Florals without pattern paper; Thing 3: insect; Thing 2: Entered Crafter's Café challenge

Crafter's Cafe: #302 - Flowers (crafterscafeblogchallenge.blogspot.com): Flowers (ends 11/11/23)

The Diva's that cut ....paper! (die-cut-divas.blogspot.com): Use a layered die set (I used Sizzix's 2-piece rose cover die set) (2/4; ends at the end of the month)

Allsorts challenge blog: Embossing or ATG (1/3; ends 11/3/23)

Beautiful Blossoms Challenge: ATG with flowers are the focus ((3/6; ends 11/12/23)

Creations in Pink: ATG in mainly pink (1/3; ends 11/13/23)

Polkadoodles Cardmaking, Craft & Scrapbooking Challenge: ATG (2/2; ends 11/10/23)

Gem of A Craft Challenge (pinkgemchallengeblog.blogspot.com): ATG (1/3; ends 11/10/23)


Friday, October 27, 2023

Easel Card Halloween Candy Box with 4 Drawers

It's time for another fun challenge over at Creative Creases, and my GD project this time is an easel card candy box for my grandson. I saw this idea on a YouTube video by Iced Images I'll link here: 🟣✂️ 4 Way Gift Box & Easel Card (Maker Team) - YouTube. I increased the size a bit and used my Silhouette Cameo 4 to cut the 4 drawers out, but the idea is from that video, so if you want to give this a try, follow along with the video. And if you'd like to make a fun fold project, please share your work with us over at Creative Creases where it's always anything goes with a fun fold: https://wp.me/p4bS0N-b6d.

I had some fun Halloween pattern papers and stickers that I thought would be perfect for this project, so I chose those and some matching purple, black, green, and orange card stock and began the project by making the four drawers. To create the drawers, I used black card stock for the outer part of the drawer and purple for the part that pulls out. Then I adhered some pattern papers to the parts that show on the outside. Ater all 4 drawers were complete, I created the base and glued the boxes to the base. I used cardboard covered in pattern papers for the base and top of the project. This gives it good stability. 

For the easel card on top, I used green pattern paper with a solid green on one side and a dotted pattern on the other. I adhered orange card stock to the bottom part of the card and 2 kinds of Halloween pattern paper to the two sections of the top which are separated by a score line that allows the card to fold into the easel shape. I added a couple trick-or-treaters to the very top section and then adhered the "Trick or Treat" panel to the bottom section. I used foam tape on the "I want candy" sentiment to make the stopper for the easel card and then had fun using various sentiment stickers and border stickers to decorate the card. 

I ended up even decorating the bottom of the box just for fun. Then I filled the drawers with mini Snickers, Twix, 3 Musketeers, and M&Ms. I think my son and DIL may be the ones who eat the candy (or at least most of it considering my grandson is only 15 months old), but they deserve a special treat! They are doing an awesome job raising Sawyer, and I'm so grateful my favorite little guy has such amazing parents! 


With the top down:


With the card fully open:


Front:


1st side:


2nd side:


Back (the trick-or-treaters are upside down from the back but right side up when the card is closed on top):


Bottom of the box:


 Challenges I'm entering: 


Digi Choosday Cardmaking & Crafting Challenge: ATG (2/2; ends 10/31/23) Top 3 Pick 11/7/23

Word Art Wednesday: ATG (4/5 for the week; 4/10 for the challenge; ends 11/1/23)

Aloha Friday Challenge: Fall/Halloween (ends 10/31/23)

Creative Fingers Challenge Blog: ATG (1/3; ends 11/2/23)

Cut It Up (cutitupchallenges.blogspot.com): Add a sentiment (2/3; ends 11/1/23)

613 Avenue Create (avenue613.blogspot.com): ATG (6/8; ends at the end of the  month)


Get Creative Challenges: Purple, black, green, and orange (ends at the end of the month)

C.R.A.F.T. Challenge (trimmiescraftchallenge.blogspot.com): Halloween/Thanksgiving (1/2; ends 11/1/23)

Two Old Bats Halloween Challenge: ATG Halloween (ends at the end of the month)

Inspiration Station (inspirationstationchallenge.blogspot.com): Inspiration photo: the theme of a family having fun with Halloween treats is perfect for my box with candy for my grandson that I plan to give him when we celebrate Halloween together at my church's Trunk or Treat event. There will be pumpkins and candy and costumes galore! (1/8; ends at the end of the month) 


{Cupcake Inspirations}: Halloween Fun (1/3; ends 10/27/23)

simonsaysstampblog.com/mondaychallenge/: Spooky (1/5; ends 10/30/23)

Thursday, October 26, 2023

Foiled Christmas Card

I recently attended the online Stress-Free Holiday Card Summit and learned loads of fun techniques. One of them was to add metallic ink to a 3D embossed background, so for this A2 card, I used Altenew's Perfect Poinsettias 3D embossing folder on deep red card stock and then used a gold ink pad to swipe over the top of the embossed details. I then trimmed the panel to 4.25X5.5 and added gold ink to all four sides of the panel just by running the ink pad along the edges. Then I adhered that panel to a white A2 card blank.  That was the end of the easy part 😂.

Next came the foiling. I really want to enjoy hot foiling, and I love the look of it, but it seems like for every one project that comes out looking nice, I end up with several that either didn't transfer the foil to all parts of the image or overfoiled quite a bit. I'm sure it's user error! Part of the problem is that I don't have the Spellbinders Glimmer Machine or the Gemini Hot Foil Machine. I'm using the Create and Craft Todo Machine that I bought brand new years ago for $5 at a local craft outlet. Unfortunately it never really took off, so there are very few YouTube videos out there on how to use it for hot foiling, so I'm kind of experimenting on my own and taking notes on what seems to work best. If anyone out there has a Todo and uses it for hot foiling, please share any tips you've discovered. 

For the sentiment, poinsettia, and foliage, I used Spellbinders' 


 Challenges I'm entering:

October Mood Board Card Challenge with Card Sketch (not2shabbyshop.com): I chose the Christmas theme and the red and green colors and poinsettias from the mood board: (3/3; ends at the end of the month)

Word Art Wednesday: ATG (2/5 for the week; 2/10 for the challenge; ends 11/8/23)


Peace On Earth Christmas: ATG Christmas (3/3; ends at the end of the month)

Doodle Challenge (rabiscochallenge.blogspot.com): ATG (3/5; ends at the end of the month)

Most Magical Time of the Year!: ATG Christmas or Halloween (ends 10/27/23)


Cut It Up (cutitupchallenges.blogspot.com): Add a sentiment (3/3; ends 11/1/23)

The Paper Shelter: Favorite Color Combo: Red and Green (especially with gold) (2/2; ends 11/1/23)

Altenew Birthday Card

I've been having fun playing with Altenew's Bewitching Rose Craft Your Life set that comes with a stamp set, coordinating die for the floral focal piece, 3D embossing folder, and 4-piece stencil set. This is such a great set in terms of versatility. I will be posting several cards I made using different elements in the set, but for this card, I die cut a piece of orange and pink ombré cardstock and then placed it in the embossing folder. (I die cut it first so I wouldn't lose any of the lovely embossed details. It was easy to line it up inside the embossing folder before running it through my eBosser.) 

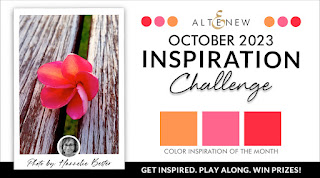
Then I stamped "birthday wishes" from the same set using red ink, fussy cut it, and adhered it to the floral focal piece using foam tape. I used a 5X7 white card base for this card and added a 5X7 white card panel on which I blended red ink on all four sides. Then I adhered a piece of 4 7/8 X 6 7/8 woodgrain patter paper to the red-edged panel and finally arranged my floral focal point how I wanted it and added it to the woodgrain panel. This was a quick card to make, but I really love the look of the 3D embossed florals. I normally wouldn't think to put orange and pink with red, but I think I like that combination (it's from Altenew's challenge board). That's something I enjoy about card challenges: they encourage me to try new ideas/techniques and to use what I have in my stash. 


Close up of the embossing details:


 Challenges I'm entering:


A Place To Start (hereisaplacetostart.blogspot.com): ATG (unlimited entries; ends at the end of the month)

Allsorts challenge blog: Fall colors or ATG (3/3; ends 10/26/23)

Word Art Wednesday: ATG (3/5 for the week; 3/10 for the challenge; ends 11/8/23)

A Perfect Time To Craft Open Challenge: ATG (unlimited entries; ends at the end of the month)

Classic Design Challenge Blog: ATG (unlimited entries; ends at the end of the month)

Doodle Challenge (rabiscochallenge.blogspot.com): ATG (3/5; ends at the end of the month)

Polkadoodles Cardmaking, Craft & Scrapbooking Challenge: ATG (1/2; ends 11/1/23) Random winner 11/4/23

Beautiful Blossoms Challenge: ATG with flowers as the focal point with optional mood board: (2/6; ends 11/12/23)

Sending Love & Hugs

I happen to be good friends with my daughter-in-law's mom, and she is facing hip replacement surgery next month and feeling concerned about it due to the complications of her Stiff Person's Syndrom (a rare autoimmune disease). She also has 2 forms of lupus and though she is only in her mid-40s, she lives with chronic pain. She is a strong Christian, so I thought I would make her a card to share an encouraging verse and lift her spirits as she awaits her surgery.

I started with a step card base that is a cut file from the Silhouette Design Store. I cut it out of white card stock using my Cameo 4 and then designed the panels to layer on it using the Silhouette Design Studio software. I chose some woodgrain pattern paper to match the graphic over at Altenew's Challenge blog. 

For the floral focal point, I die cut and embossed some white cardstock using Altenew's Bewitching Rose embossing folder and then used the coordinating stencils to color in the embossed image. I used red, pink, and orange as my color palette to match the challenge photo. I really love the depth the stenciling gives the image! I adhered the floral focal point using foam tape to give it some dimension and stamped the "Sending love and hugs" sentiment directly on the woodgrain pattern paper. The sentiment is from the Bewitching Rose stamp set. 

For the inside of the card, I cut more woodgrain pattern paper and did a print and cut of the verse on orange card stock. Then I used Altenew's Proud of You stamp and coordinating stencil to add the flower on the inside of the card. I fussy cut it since I don't have the matching die. 

Finally, I added an orange panel to the back of the card for my message to my friend. If you are facing a challenging situation right now, I pray you will take comfort in Psalm 34:4: "I sought the Lord, and he heard me, and delivered me from all my fears." God is faithful and trustworthy and will be with you no matter what you are facing. 


Close up of the embossing and stenciling:


Inside of the card laid flat:


Back of the card:


 Challenges I'm entering: 


Word Art Wednesday: ATG (5/5 for the week; 5/10 for the challenge; ends 11/1/23) Top 3 Pick 11/8/23

Allsorts challenge blog: Fall colors or ATG (2/3; ends 10/26/23)

A Place To Start (hereisaplacetostart.blogspot.com): ATG (ends at the end of the month) Rising Star Pick for 10/30/23-11/3/23

Creative Fingers Challenge Blog: ATG (3/3; ends 11/2/23)

Cut It Up (cutitupchallenges.blogspot.com): Add a sentiment (1/3; ends 11/1/23)

613 Avenue Create (avenue613.blogspot.com): ATG (7/8; ends at the end of the month)

Crazy is our fame - STENCILS are our game! (stencilfun.blogspot.com): ATG with a stencil; option of orange (1/3; ends 11/4/23)


Beautiful Blossoms Challenge: ATG with flowers as the focal point with optional mood board: (1/6; ends 11/12/23)

Wednesday, October 25, 2023

O Holy Night Nativity Step Card

Each year I make 250 Christmas cards for my mom to send out, and each year I try to find a design that: focuses on Jesus, includes a fun fold, and is something I can mass produce. This year it took me 4 tries before I settled on this pretty step card design by Lori Whitlock. I purchased the cut file in the Sihouette Design Store and then sized it up a bit to fit in my 5X7 envelopes (it was originally for an A2 size card, but the great thing about cut files is that they can be resized unlike metal dies). 

Once I had settled on the card design, I then chose my pattern papers. I had some red glitter card stock that I thought looked lovely with the poinsettia papers I had in my stash, so I used those 2 patterns on the front of the card. I did a print and cut of the sentiment (the sentiment came with the step card file) and adhered that to the poinsettia panel. Then I asked my husband's opinion on the card, and he thought it needed something on the inside so that the nativity scene stood out better. I found some pretty cardstock with Christmas lights on a black background and designed a panel to fit the inside of the card using my Silhouette Design Studio software since Lori's file didn't include an inner piece. Then I cut out all the bases and layering pieces and adhered everything. 

For the back, I chose an Our Daily Bread stamp that has a lovely star and rays that says: Come let us adore Him! I try to make Christmas cards that emphasize the true meaning of Christmas: Jesus our Savior came to earth to live the sinless life we cannot, and then He sacrificed Himself on the cross to pay for our sins and make a way for sinners to be reconciled to God and to receive the gift of eternal life. Come let us adore Him indeed! 


Front of the card:


Back of the card:


Top view:


Side views:


A look at the box with 250 envelopes in it:


One of the 2 boxes of cards I gave my mom:


 Challenges I'm entering: 
Anything Goes with a Fun Fold for Creative Creases #68 (secretstamper.com): ATG with a fun fold (unlimited entries; ends 10/27/23)

Word Art Wednesday: ATG (1/5 for the week; 1/10 for the challenge; ends 11/8/23)


ABC Christmas Challenge: U for Use it Up and V for Vertical (I used up lots Christmas pattern papers making 250 of these cards 😁.) (ends 11/4/23)

Peace On Earth Christmas: ATG Christmas (2/3; ends at the end of the month)

Doodle Challenge (rabiscochallenge.blogspot.com): ATG (2/5; ends at the end of the month)

Most Magical Time of the Year!: ATG Christmas or Halloween (ends 10/27/23)


A Perfect Time To Craft Open Challenge: ATG (unlimited entries; ends at the end of the month)

Classic Design Challenge Blog: ATG (unlimited entries; ends at the end of the month)

The Paper Shelter: Favorite Color Combo: Red and green for Christmas (1/2; ends 11/1/23)


Creative Inspiration Challenges: ATG (1/2; ends 10/26/23)

Allsorts challenge blog: Autumn colors or ATG (1/3; ends 10/26/23)

613 Avenue Create (avenue613.blogspot.com): ATG (8/8; ends at the end of the  month)

A Place To Start (hereisaplacetostart.blogspot.com): ATG (ends at the end of the month)

October Mood Board Card Challenge with Card Sketch (not2shabbyshop.com): I chose the Christmas theme and the red and green colors and poinsettias (on my pattern paper) from the mood board: (2/3; ends at the end of the month)