Monday, February 19, 2024

Altenew Rose Flurries Birthday Card

My son turns 23 tomorrow, and I wanted to make him a special card to celebrate! To start, I chose a white A2 card base. Then I created a blue panel just slightly smaller than the card base. On a white panel just slightly smaller than the blue one, I used Altenew's Geo Steps 3D embossing folder to emboss the background. I stamped "Have a perfect birthday" and "Love you" using my Sizzix Stencil and Stamp Tool. 

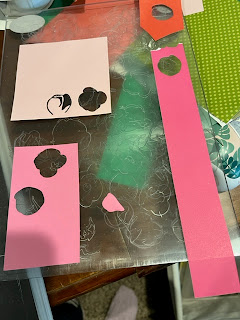
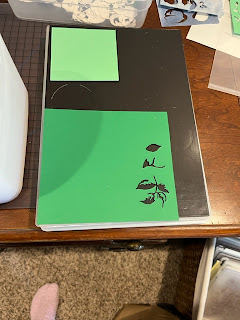
Then I arranged the florals and foliage from Altenew's Rose Flurries 3D Die Set (some I cut from colored cardstock and some I used my Ohuhu alcohol ink markers to color) and used some Glad Press 'n Seal to keep them where I wanted them as I glued them down. I decided to add some blue pearls because I needed to cover a spot where my ink smudged by the "H" in "Have." 😁Embellishments have saved the day for me on more than one occasion!


Challenges I'm entering:
TIME OUT Challenges: Birthday. Happy 10th! (5/5; ends 2/28/24) C5

Beautiful Blossoms Challenge: Anything floral goes (5/6; ends 3/12/24)

Word Art Wednesday ATG  (ends 2/28/24)


Birthday Wishes Ranunculus Card

February is a big month for birthdays in my circle of friends and family! I have 3 cousins with birthdays and a couple friends with birthdays this month, so I've been busy creating some birthday cards.

For this card, I created a top-folding A2 card base out of double-sided orange card stock with polka dots on one side and plain orange on the other. Then I die cut dies from SU!'s retired Ranunculus Romance set. I cut a panel of pretty floral pattern paper and then adhered it to the card base. I adhered the die cut flower with foam tape and the leaves with liquid glue onto the pattern paper. Then I heat embossed the "Sending you birthday wishes" onto an orange panel in white embossing powder and popped that up using foam tape. It's still cold and snowy here in Michigan, but this card reminds me that spring will eventually arrive!


 Challenges I'm entering:

TIME OUT Challenges: Birthday celebration! Congratulations! (3/5; ends 2/28/24) C5


Snippets Playground (pixiessnippetsplayground.blogspot.com): ATG using snippets: All the die cuts (2 layered ranunculus and the green leaves) were die cut from my snippets collection. (1/1; ends 3/2/24)

Word Art Wednesday: ATG (ends 2/28/24)

Beautiful Blossoms Challenge: ATG with flowers as the focal point

Creative Knockouts: Die cuts, punches, or stencils(ends at the end of the month)

Floral Acanthus Embossed Birthday Card

I recently purchased some Crafter's Workshop stencil butter and decided to give it a try with the birthday card I wanted to make for one of my cousins. I love how the Green Pear and Lime Green colors turned out on this embossed card!

I started with a piece of light pink card stock I embossed using Altenew's Floral Acanthus embossing folder. Altenew has a lot of sets that include stencils for their embossing folders, and this Craft-Your-Life Floral Acanthus set is one of them. There are actually stencils for the embossing folder and a separate set of stencils for the coordinating stamps in this set. Lots of crafty goodies to play with! 

After embossing the card stock, I started with the stenciling. You have to be patient using stencil butter with layered stencils since it takes some time for the first layer to dry, but I love the shine on the foliage from the two shades of green stencil butters I used. Then I also added some gold Nuvo drops for the center of the central flower and used Altenew's rose gold embossing powder for the sentiment. I adhered my embossed panel to a cardstock panel whose edges I covered in gold tape to look like metallic gold cardstock. Hopefully my cousin will love all the shine on this card! 

FYI: I've also tried Nuvo's embellishment mousse and Simon Hurley's lunar paste, and I found the lunar paste and stencil butter much creamier and easier to spread than the embellishment mousse. 


Challenges I'm entering:

TIME OUT Challenges: Birthday celebration! Congratulations! (4/5; ends 2/28/24)


Beautiful Blossoms Challenge: ATG with flowers as the focal point (3/6; ends 3/15/24)

Can You Handle The Pressure? (cyhtp.blogspot.com):ATG with an embossing folder (ends 2/21/24)

Crazy is our fame - STENCILS are our game! (stencilfun.blogspot.com): ATG with a stencil (ends at the end of the month)

No more challenges. 

Friday, February 16, 2024

Greenhouse Card for Creative Creases #76

It's time for another challenge over at the Creative Creases blog where it's always anything goes with a fun fold, and I'm back with another guest design card. Please join the fun with your fun fold projects here: https://wp.me/p4bS0N-byD

The card design I used for this card came from a free Altenew tutorial in their All About Layering series. I really liked the look of the acetate window over the base making the flowers look like they are in a greenhouse. To create the card, cut a piece of acetate to 4 1/4 by 11 inches. Score at 5 1/2 inches. Then, on a piece of 4 ¼” x 5 ½” cardstock (I used black but you can use any color), score at ¾”, 1 ½”, 2 ¾”, 4”, 4 ¾”. Fold it in half first, then fold the next fold up, then the other ones back down to get mountain folds. Apply super sticky tape to the front and the back little flaps. This is where the acetate window will be attached.  Adhere one side of this flap onto the acetate and then start arranging the floral images and adhere them to the inside card. Then adhere the other acetate flap onto the acetate. Finally, cut two strips of 4 ¼” by ¾” card stock and cover both the front and back of the card to hide the sticky adhesive from showing. I heat embossed the sentiment with white embossing powder onto one of these pieces before adhering it to the front of the card. 

The floral stamps I used for this card came from Altenew's Build-A-Flower: Canterbury Bells. I stamped the multi-layer stamps in shades of orange, pink, and purple. That stamp set comes with 2 smaller flower branches that don't have any layering stamps (just the outlines), so I stamped and die cut those smaller stamped images and colored them with my Ohuhu alcohol ink markers. 
 
To finish the card, I added a butterfly I die cut out of pink vellum. 


Side views:


Close up of the florals:


I created a jig to place the die cut pieces in so I could stamp several of the die cuts all in one session. This stamp set has the outline stamp, 3 layers of stamps for the flowers and 3 layers of stamps for the leaves, so having a jig helped me with perfect placement for each layer. 


This time Creative Creases is partnering with Double Trouble, so you can double the fun by entering both challenges! Here's a link to Double Trouble's challenge and the details about the theme this time: Double Trouble Paper Crafting (doubletroublechallenge.blogspot.com)


Challenges I'm entering: 

Double Trouble Paper Crafting (doubletroublechallenge.blogspot.com): see graphic above Thing 1: fun fold Thing 3: I'm the GD over at Creative Creases this time Prize Winner 3/1/24 MFT clear stamp set and Crafter's Companion rubber stamp set arrived 3/14/24

Butterfly Challenge (butterflyspotchallenge.blogspot.com): Playing in the first prize category: 3 colors: burnt orange, bud green, and baby pink, birthday theme, butterfly (ends 2/21/24)


No more challenges. 

Thursday, February 15, 2024

Watercolored Dear Dahlia Card

I recently saw a blog post with water coloring ideas here: Creating easy watercolor designs (designsrachel.wixsite.com) and loved the technique of creating a water colored panel and then die cutting a section of the panel and popping that part up on foam tape. 

The first step was to water color green, orange, and pink stripes onto watercolor paper. In hindsight, I wish I had made the orange stripe thinner and maybe done more blending between the colors, but every card is a learning experience! Next time I also want to do more of a mix of colors rather than separate stripes like I did here. 

After the watercoloring had dried, I then die cut the floral focal point out of the panel BEFORE stamping it. This paper is heavy, and I have found that my post-it note tape doesn't always hold my dies in place without shifting, so I die cut and THEN stamped the florals using VersaMark ink and Altenew's rose gold embossing powder. The stamp I used is from Altenew's Dear Dahlia's Build A Garden set.

I trimmed the watercolored panel to fit a 5X7 card base and then adhered the background to the card base with ArtGlitter liquid glue. Then I popped up the floral focal point using foam tape and stamped the sentiments "Happy birthday" and "sending lots of love" onto the card front. I added some gold sequins for additional sparkle and then went to work on the inside of the card.

I trimmed a piece of light pink card stock and stamped it using the same Dear Dahlias stamp I used on the front of the card, but this time I stamped partial images onto the top right and bottom left of the pink card stock. I added an orange die cut butterfly to finish the card. I have 3 cousins with February birthdays, so I'm working on cards for each of them this week. 


View of the inside of the card:


Challenges I'm entering:

Inspiration Challenge February 2024 | Mother's Bouquet (altenew.com): (ends at the end of the month)


TIME OUT Challenges: Birthday (1/5; ends 2/28/24) C5

Beautiful Blossoms Challenge: Anything floral goes (ends 3/12/24)

We Love to Create mixed media Challenge Blog...sponsored by Polkadoodles (welove2create.blogspot.com): Anything mixed media goes (ends 2/24/24)


As You Like It Challenge: Favorite: Digital or Physical Stamps and Why: This is such a tough choice as I love to use both kinds of stamps, but lately I've been using a lot of Altenew clear stamps on my cards, like this Dear Dahlia set. I love being able to use VersaMark ink and embossing powder on physical stamps to do heat embossing because it gives such a lovely look to the stamped outline. I also can't use water color paper in my printer, so I like being able to use a physical stamp in my stamp platform for heavier papers that jam up my printer. (1/3; ends 2/21/24)

No more challenges. 

Monday, February 12, 2024

So Blue Without You Card

My youngest daughter is in the Navy and lives across the country from our family. We miss her terribly! It's especially hard when she's miserably sick (she currently has pneumonia!), but we can pray for her and enlist other friends and family to pray for her as well. And I can make her cards of course! And send snacks! 

For this non-traditional Valentine's Day card, I started by creating a blue A2 card base. I ink blended a 4 inch by 5 1/4 panel with Stormy Skies distress ink and then splattered with some water and some white pearlescent water color paint. After it dried, I embossed it with Altenew's From Land to Sea embossing folder and adhered it to my A2 card base. 

The flowers and foliage were layering dies from Altenew's Rose Flurries 3D die set. The "you" sentiment was die cut with the Mega You die from Altenew. I did the "we're so blue without" sentiment as a print and cut using my Silhouette Design Studio software to design the sentiment and my Cameo 4 to cut it out. It looked too stark white so I blended on a bit of blue ink and adhered it to the card. I added 3 small blue beads to the 3 little flowers above the "u" in "you and then went to work on the inside of the card. 

For the inside of the card, I had some pretty washi tape that has been sitting in my washi tape storage bin for years that I wanted to finally use! I adhered it to the right side of the card and then trimmed it at the bottom. I adhered a piece of very light blue card stock to the left of the washi tape so I would have a place to write my message to my daughter. Then I added another foliage die cut from the same Rose Flurries set to finish off the card. I hope it reminds my daughter of how very much she is loved and missed every day. 


Challenges I'm entering: 

simonsaysstampblog.com/wednesdaychallenge/: Love is in the air (2/5; ends 2/14/24)
 

The Diva's that cut ....paper! (die-cut-divas.blogspot.com): Non-traditional Valentines (ends at the end of the month)

Allsorts challenge blog: Hearts or ATG (3/3; ends 2/16/24)

Word Art Wednesday: ATG (4/5 for the week; ends 2/14/24)

The Paper Funday Challenges: ATG or no pattern paper: I didn't use any pattern papers for this card. I used ink blending, alcohol markers to color some of the die cuts, and washi tape to decorate the inside of the card (2/4; ends at the end of the month)

A Place To Start (hereisaplacetostart.blogspot.com): Monochrome (ends at the end of the month) Rising Star for Week 2

Can You Handle The Pressure? (cyhtp.blogspot.com): ATG with an embossing folder; twist of red and/or pinks: I used Altenew's From Land to Sea EF (2/21/24)


Triple B (dd-tripleb.blogspot.com): ATG with birds, blooms, or butterflies (ends at the end of the month)


Word Power (wordpowerchallenge.blogspot.com): ATG with the sentiment as the focus (ends at the end of the month)

Sunday, February 11, 2024

With Deepest Sympathy Tone-on-Tone Card

Unfortunately, I've been needing a lot of sympathy cards recently. To create this one, I ink blended 2 panels with Stormy Skies distress ink and added a bit of pearlescent watercolor splatter. I trimmed the first ink-blended panel to fit on an A2 card base and then die cut and embossed Altenew's Bewitching Rose set on the other ink-blended panel. I adhered the embossed die cut floral focal point to the card base and then stamped "with deepest sympathy" (from Altenew's Build A Flower: Columbine set) over it using my Sizzix stamping platform. 


Challenges I'm entering: 


Allsorts challenge blog: Hearts or ATG (2/3; ends 2/16/24)

Word Art Wednesday: ATG (3/5 for the week; ends 2/14/24)

The Paper Funday Challenges: ATG or no pattern paper (1/4; ends at the end of the month)

A Place To Start (hereisaplacetostart.blogspot.com): Monochrome (ends at the end of the month)

Can You Handle The Pressure? (cyhtp.blogspot.com): ATG with an embossing folder; twist of red and/or pinks (2/21/24)


Saturday, February 10, 2024

Valentine Candy Box

I recently attended a Valentine crafting class where we made the base for this little box. I took it home and embellished it with some fun layered florals and foliage (from Altenew's Rose Flurries 3D die set). I love this die set because it creates so many multi-layered roses and leaves.

To make the roses, I chose some scraps of pink and red card stock and die cut all the layers. I did the same for the leaves, again using scraps from my huge scrap collection! These dies are great for using snippets! 

I stamped the sentiment "with all my love" (from Altenew's Paint-A-Flower: waterlily dahlia stamp set) with Versamark ink on pink card stock and heat embossed it with rose gold embossing powder. It's hard to tell in the photos, but the pattern paper I used has gold accents.

For the inside of the box, I decorated the stamped heart die cut with additional roses and leaves from the Rose Flurries set. I did some surgery on some of the foliage pieces to make them fit the way I wanted 😁. 


Here's a look at the box when it's open. I added some Hershey's kisses and heart-shaped Reese's peanut butter cups:


Close up of the die cuts:


Close up of the candy 😋:


A look at the scraps/snippets I used:


Challenges I'm entering:


simonsaysstampblog.com/wednesdaychallenge/: Love is in the air (2/5; ends 2/14/24)

Allsorts challenge blog: Hearts or ATG (1/3; ends 2/16/24)

Word Art Wednesday: ATG (ends 2/14/24)

Double Trouble Paper Crafting (doubletroublechallenge.blogspot.com): Thing 1: Love is in the air (I was so excited to have the perfect stamp for this! And the "love is in the air" sentiment fit perfecting in that die cut heart inside the box!) Thing 3: Used pink, red, and green from Color My Heart challenge Thing 2: Entered Color My Heart challenge (2/4; ends 2/15/24)

Color My Heart Color Dare: Color Dare #586 - Fancy Five: I used green, pink, and red for my project (ends 2/15/24)


Creative Knockouts: Love/Valentine's Day/Anniversary (2/2; ends 2/14/24) C10

Snippets Playground (pixiessnippetsplayground.blogspot.com): ATG with snippets (ends 2/17/24) Thanks for inspiring me to use my snippets! C10

No more challenges. 


Tuesday, February 6, 2024

Praying For You CAS Card

A friend of mine recently shared that she's been struggling with depression for the last couple of months, and I wanted to make a card for her to let her know I'm praying for her. 

I stamped one of the floral stamps from Altenew's Nature's Magic Build A Garden set, and then die cut it with the coordinating die. I colored the flowers with my Ohuhu alcohol markers. Then I chose some watercolor brush markers and added some splatters to the bottom right section of the card. I stamped "praying for you" (from Altenew's Grand Carnations) in the top left and adhered the floral focal point over the watercolor splatters. I hope the pretty pinks will lift my friend's spirits. 


Challenges I'm entering: 

 The Paper Shelter: Something beginning with "F" (Flowers) (1/2; ends 2/7/24)


TIME OUT Challenges: CASE this card: I copied the layout of the card and used watercolor splatter under the floral focal point to mimic the paint splatters in the original card (1/5; ends 2/14/24) C5


Word Art Wednesday: ATG (2/5 for the week; 2/5 for the challenge; ends 2/14/24)


Friday, February 2, 2024

Heart Swing Cards for Valentine's Day

It's time for a new challenge over at the Creative Creases blog, and I'm honored to be a guest designer! It's always anything goes with a fun fold over at Creative Creases, so I hope you will join in the fun and share your fun fold projects here: https://wp.me/p4bS0N-bxr.

I am sharing a Valentine's Day card this time, and my Valentine's Day cards this year feature a mushroom theme. I found some darling digital mushroom paper at the Silhouette Design Store and used it to fill in the heart swing card base which is also a cut file from the Silhouette Design Store. I designed a print and cut for the sentiments using my Silhouette Design Studio software and used a Polkadoodles pre-colored digi stamp with a cute hedgehog sitting with some mushrooms that I sized to fit in the first heart. I printed out 180 of each of the elements for the card and then began glueing all the parts together and folding all the score lines. My Silhouette Cameo 4 is a workhorse and did a great job cutting out all the parts. My mom sends out 150 cards to shuts ins, friends, people from her church, etc. for most holidays as a ministry, and I in addition to her cards, I made some extras to send to the shut ins at my church and some friends and family members. I plan to do another set using that darling little hedgehog for my Bible Study Fellowship students. Polkadoodles has some of the cutest digi stamps!

For the envelope flaps, I used a SU! sentiment and heart stamp from the Share A Milkshake bundle and added another heart stamp from my stash. I used my MISTI to stamp out all the envelopes. I love being able to restamp if I don't get a good impression the first time. 


Here's a look at what the card bases and pieces looked like before the bases were folded and the elements were adhered:


Challenges I'm entering: 

Word Art Wednesday: ATG (1/5 for the week; 1/10 for the challenge; ends 2/14/24)

The Paper Funday Challenges: Let's Celebrate (3/6; ends 2/4/24)


simonsaysstampblog.com/mondaychallenge/: Have a Heart (1/5; ends 2/5/24)


Double Trouble Paper Crafting (doubletroublechallenge.blogspot.com): Thing 1: Love is in the Air Thing 3: Entered in Color Dare Challenge

Color My Heart Color Dare: Pink, red, and green (the grass by the hedgehog) from the color palette (ends 2/16/24) 

Creative Knockouts: Love/Valentine's Day/Anniversary (1/2; ends 2/15/24) C10